How to Add a Chatbot on Your Website (Step-by-Step Guide)
Published on May 28, 2025

Your website is often the first point of contact between you and your potential customers. But what happens when visitors have questions outside your working hours? A chatbot on your website solves that instantly. With a chatbot on website, you can offer 24/7 support, provide instant answers to common questions, and guide users to the right pages or offers. This not only improves the user experience but also reduces the number of support tickets and increases conversions by keeping users engaged.
2. What Makes Chatmoat Different?
While there are many chatbot tools out there, Chatmoat stands out by being incredibly fast, smart, and easy to use. There’s no coding required. You simply add your website, and Chatmoat automatically trains your chatbot on your website - based on your existing content. It supports over 85 languages, provides lightning-fast answers, and is scalable for businesses of all sizes. You can customize the tone and behavior of your chatbot in minutes, and the entire setup can be done in less time than it takes to make a coffee.
Step-by-Step: How to Add a Chatbot on your Website
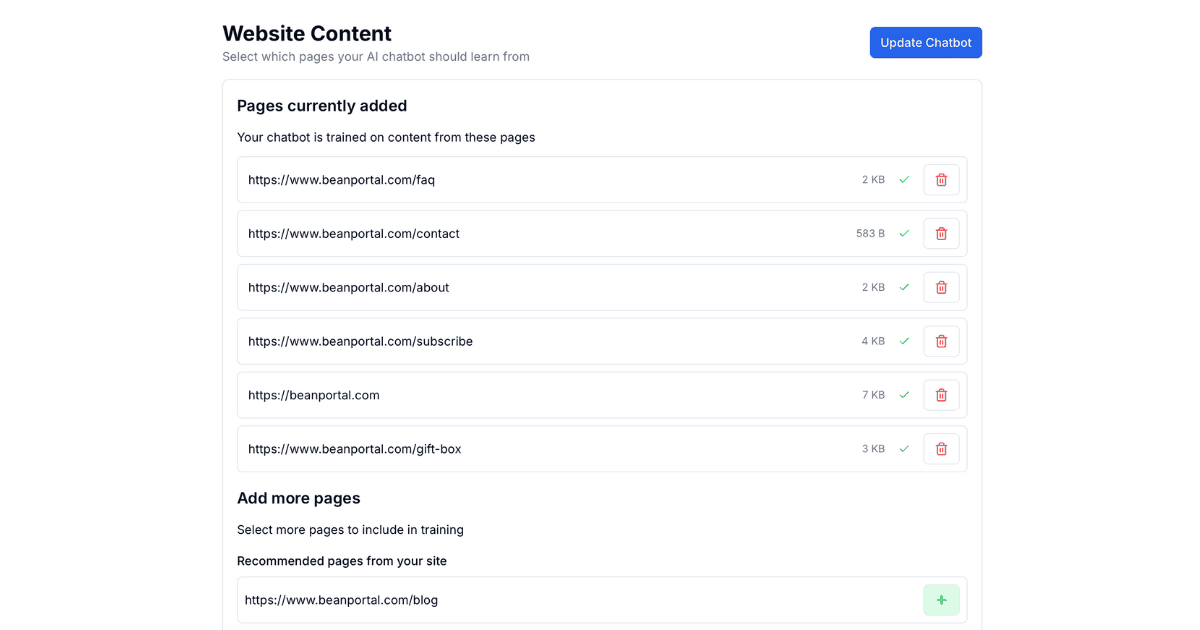
3. Step 1: Add Your Website
Once you sign up for Chatmoat, the first step is to enter your website URL. Chatmoat will automatically crawl your site and use that content to train your chatbot. This ensures your bot understands your business, your offers, and how to respond accurately to customer questions from day one. Do you have content that you want your chatbot to train on that isn’t on your website? No worries, you can add more custom data to your chatbot later.
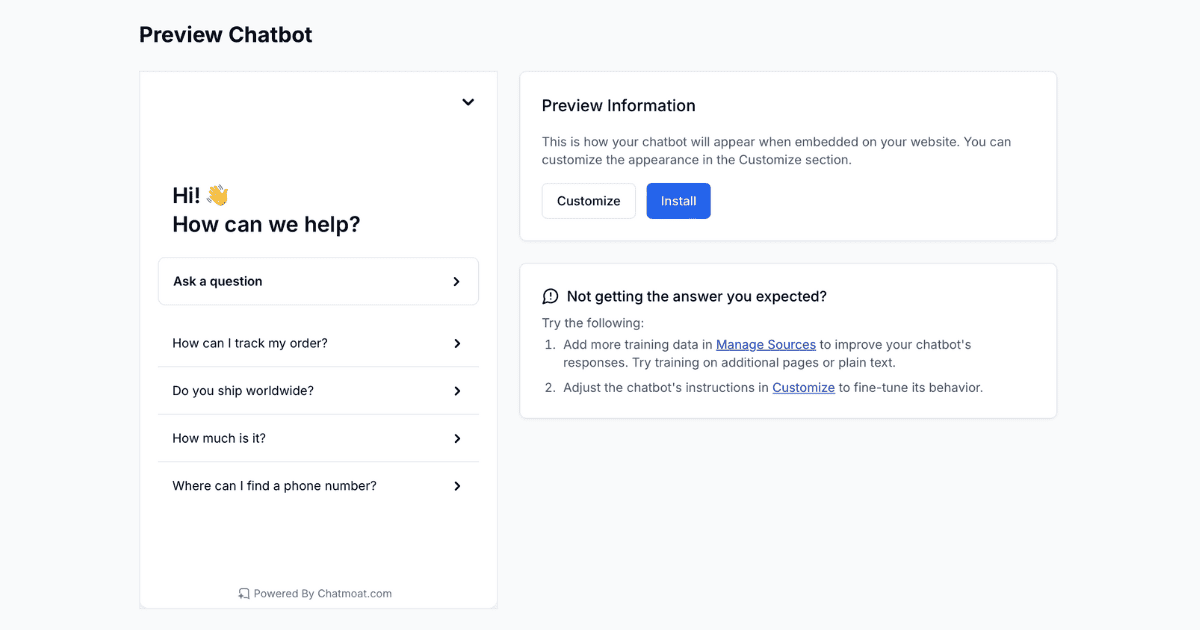
4. Step 2: Customize Your Chatbot
Next, you can personalize your chatbot to reflect your brand. Choose the tone of voice, set the main welcome message, and add any custom instructions you want your chatbot to follow.
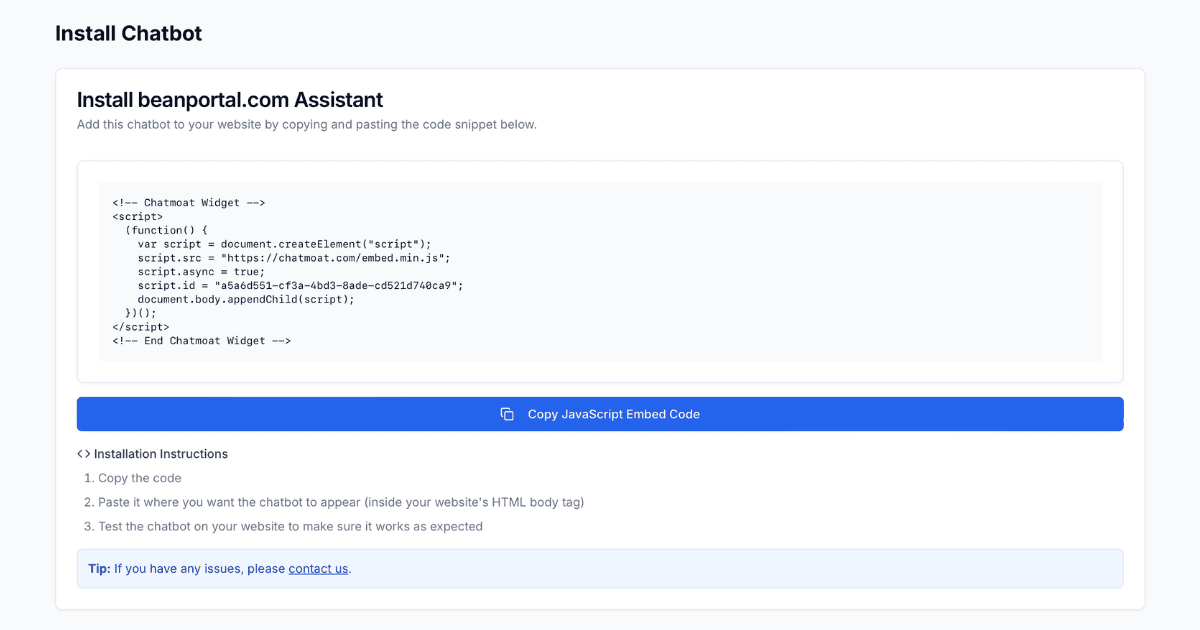
5. Step 3: Install with a Single Snippet
After customizing your chatbot, Chatmoat gives you a small JavaScript snippet. Simply copy and paste this into your website’s code, or use your site builder’s integration settings if you’re using platforms like WordPress or Webflow. The installation takes less than a minute.
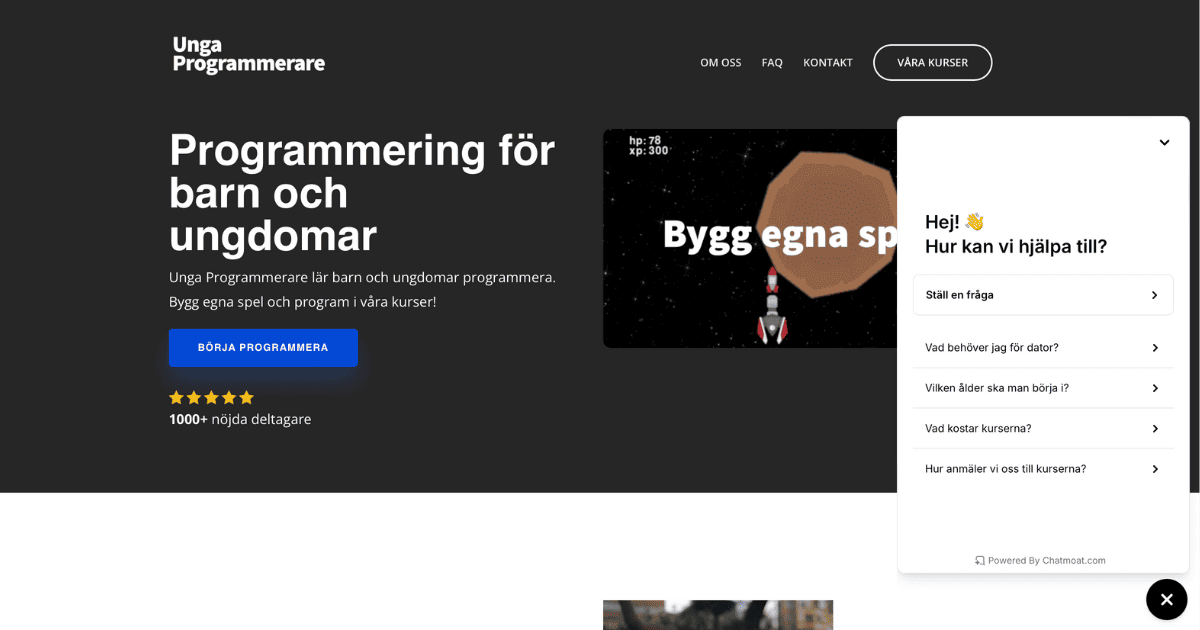
6. Step 4: Go Live and Start Helping Visitors
Once the snippet is installed, your chatbot goes live and is ready to engage with visitors. It can answer questions in real-time, guide users through your offerings, and reduce the workload on your support team. Whether it’s day or night, your chatbot on website is working around the clock to improve customer satisfaction and boost conversions.
7. Tips to Get the Most Out of Your Chatmoat Chatbot
- Regularly review chatbot interactions to spot common questions or gaps in content.
- Add specific FAQs or instructions for edge cases.
- Add pre-defined questions that your visitors can choose for the most common questions.
- Customize fallback responses for a more human-like experience.
8. Real Results: How Unga Programmerare Cut Support Tickets by 68%
At Unga Programmerare, we implemented Chatmoat to handle common customer questions. The results were immediate: a 68% drop in support tickets. It allowed the Unga Programmerare team to focus on their courses and customer success rather than answering repetitive emails.
9. Conclusion: Smarter Support in Minutes, Not Weeks
Adding a chatbot to your website doesn’t have to be complicated or expensive. With Chatmoat, you can have a powerful, AI-driven assistant up and running in just a few minutes. It’s a simple way to improve customer service, increase engagement, and reduce your support workload. Try it today with our free trial, no credit card required, and experience the future of website support for yourself.